Turkey Sausage and Arugula Pasta

Turkey Sausage and Arugula Pasta

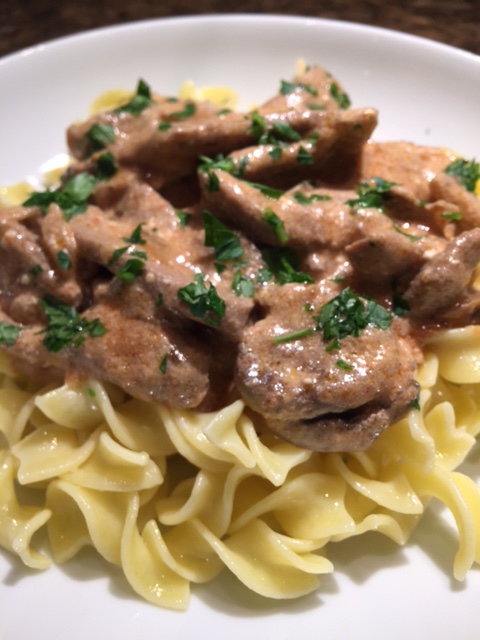
I have been making this dish since I saw Giada making it on her Food Network show a few years ago.  She tops this yummy sauce over baked potatoes, but I far prefer it served with pasta.  This dish looks really similar to another dish I made, Cheesy Sausage Pasta, but it is very different.  I just like to use shells as my pasta of choice. 🙂

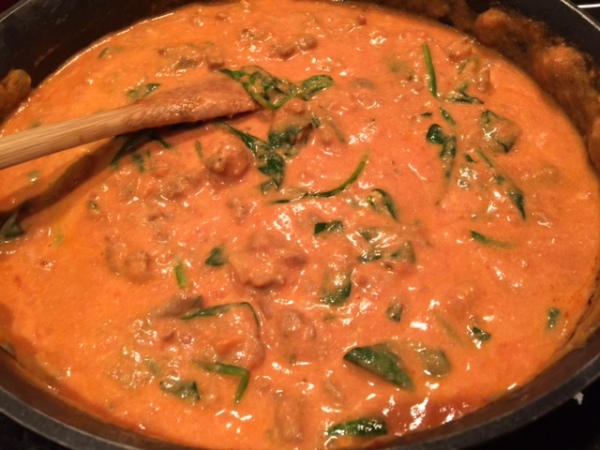
There are many things that I like about this dish.  It’s a great weeknight meal, because it comes together quickly.  The sausage adds so much flavor on it’s own.  It’s almost fool proof! You can easily switch out the arugula for spinach, should your local grocery store not carry it.  Like I did this time around.  I do prefer arugula, though, as it doesn’t go mushy as quickly as spinach.  But, my daughter loves both, and that’s enough for me!

In a pinch, you can use pork sausage for this recipe, as it is more readily available, but be sure to drain off the fat.  Sweet sausage is also much more kid friendly than the spicy variety.  My daughter picked up on the spice in this dish right away when I couldn’t find sweet sausage, and she wasn’t as big a fan.  So, I stick to the sweet stuff now.

IMG_9752

The arugula or spinach will look like too much when you first add it to your dish.  But, it will wilt down really quickly.

IMG_9753

See? Mmmmm….this is yummy stuff.

IMG_9754

Here’s what you need to do:

Turkey Sausage and Arugula Pasta

1 tablespoon olive oil

1 medium white or yellow onion, diced

2 cloves garlic, minced

1/2 tsp each salt and pepper

1 package of sweet turkey sausage (about 4 or 5 sausages), casing removed

1 jar tomato basil sauce (2 cups)

3 cups arugula or spinach

1/2 cup mascarpone cheese

1/2 cup grated parmesan cheese

1 pound pasta, your choice of noodle

In a large skillet, sauté the onions in olive oil over medium high heat until translucent.  Add minced garlic and salt and pepper and cook for 1 minute, stirring often.  Add the turkey sausage and cook until the meat has cooked through. Add in the tomato sauce and arugula.  Let the arugula cook into the sauce until it reduces in size.  Add in the mascarpone cheese and stir till combined. Remove the skillet from the heat, and stir in the parmesan cheese.  Add pasta into the sauce, and finish with more parmesan cheese.

Enjoy!

(Source: Adapted from: http://www.foodnetwork.com/recipes/giada-de-laurentiis/baked-potatoes-with-sausage-and-arugula-sauce-recipe.html)


Weeknight Beef Stroganoff

Weeknight Beef Stroganoff

IMG_9298

My mom used to make beef stroganoff for special occasions when I was young.  It’s still one of my brother’s favorite dishes.  I came across this recipe that is so similar to my mom’s, and such a cinch to make!  I’ve made it several times now.  Mid week!  Easy and so tasty!  And a great way to introduce steak to your littles.

Speaking of steak, this dish doesn’t require an expensive cut.  Sirloin is what most people use.  I used Rib Eye because that is what I had in the freezer.  Any cut would work.

The first time I made this, I used a whole can of tomato paste, because I didn’t want to throw away what was left in the can.  I could instantly tell that the sauce was too tomato-y, so I added more broth and it turned out just fine.  The second time I did this, I only used the recommended amount, and it was also very good.  So, you can’t really go wrong.

Here’s what you need to do:

Weeknight Beef Stroganoff

2 Rib Eye Steaks, thinly sliced

2 Tablespoons olive oil

1 Medium onion, diced

Mushrooms, sliced (8 ounces)*

2 Tablespoons all-purpose flour

2 Cups beef broth

3 Tablespoons tomato paste

3 Tablespoons dry sherry

1 1/2 teaspoons salt

1/2 teaspoon pepper

1 teaspoon dried thyme

1 Cup sour cream**

2 Tablespoons chopped parsley

Cook egg noodles in boiling salted water until al dente (soft but still a bite); toss with butter once cooked (about 2 tablespoons), and set aside.

In a large skillet, heat oil and add the beef in batches, so that the meat doesn’t overcrowd and boil.  The beef will cook very quickly.  Cook for about 2 minutes per side, depending how thinly you sliced your steak. Remove to a plate and set aside.

Add in the onion and cook until translucent, about 5 minutes.  Next, add in the mushrooms and cook until soft, another 5 minutes.  Sprinkle in the flour and stir for 1 minute.  Stir in the beef broth and tomato paste and stir until the sauce thickens a little, about 2 minutes.

Return the beef, and all its juice, to the pan.  Add in the sherry, salt, pepper, and thyme.  Reduce the heat and allow the sauce to simmer for about 5 minutes.  Remove the pan from the heat and add in the sour cream.  Sprinkle chopped parsley into the sauce, reserving some for garnish.  Serve over buttered egg noodles.

Enjoy!

*If you buy the package of pre-sliced mushrooms, they measure 8 ounces

**You can use whatever type of sour cream you like, but full fat makes this dish much more scrumptious

(Source: Creamy Beef Stroganoff)


Leftover Turkey Pot Pie

Leftover Turkey Pot Pie

IMG_9625

I’m visiting my parents over the holidays right now.  Nothing was planned for dinner tonight, and since we had a lot of leftovers, I got to thinking of what I could do.  My mom happened to have everything at home to make this dish, so it was a no brainer.  This is really easy, and tasty!!

For the pie crust, I used store bought.  It’s quick and easy.  Don’t fuss over making your own for this dish.

Here’s what you need to do:

Leftover Turkey Pot Pie

1/4 cup butter

1/2 cup each diced onion, diced carrot, and diced celery

3 cups shredded turkey

1/4 cup flour

3 cups reduced sodium chicken broth

Splash of white wine (optional)

1/4 teaspoon turmeric

salt and pepper, to taste

1/4 cup half and half

1 whole unbaked pie crust

1 whole egg

2 tablespoons water

Preheat oven to 375 F.  Melt butter in a large pan over medium-high heat.  Add the onions, carrots, and celery and cook until the onions become translucent.  About 5 minutes.

Add the shredded turkey and mix into veggies.  Stir flour into the meat and veg.  Cook for about 1 minute, to cook off the flour flavor.  Add the broth and wine and cook until the sauce thickens.  Add the turmeric, salt, and pepper.

Add half and half, and let mixture bubble.  Remove from heat and pour mixture into a casserole dish.

Prepare pie crust according to package instructions.

Place pie crust over top of meat mixture.  Brush with egg wash (whipped egg and 2 tablespoons water).  You won’t need to use all of the egg wash.  Bake for 30 minutes, or until the crust has browned.  Enjoy!

(Source: Adapted from Leftover Turkey Pot Pie)

Slow Cooker (Spaghetti and) Meatballs

Slow Cooker (Spaghetti and) Meatballs

We are on a bit of a meatball craze these days.  My daughter loves them, so that makes it especially motivating.   I have already posted a recipe for The Mighty Meatball, but I like to use those meatballs for everything but the traditional ‘spaghetti and meatball’; although, you could very easily use those that way too!  I actually got this recipe off of a page that I liked on Facebook, called Tasty.  It’s an ingenious site, with quick viewings of complete recipes.  I liked the slow cooker option to this recipe, since, if I can, I like to prepare more than one meal on a Sunday, and this recipe allows for that!

The first time I made this, I followed the recipe exactly.  Originally, it calls for hot Italian sausage and and square of mozzarella inside the meatball.  Personally, I didn’t notice the cheese at all, and my daughter really did notice the heat from the hot sausage.  So, the second time I made it, I eliminated both, and it was a hit!  It can’t get much easier than this guys.  Try this recipe!

Here’s what happened:

IMG_9202

Slow Cooker Meatballs

1 lb lean ground beef

1 lb sweet Italian sausage

1/2 teaspoon garlic powder

2 teaspoon salt

1 teaspoon pepper

1 cup bread crumbs (plain or seasoned)

1/4 cup parmesan cheese

2 eggs

1/2 cup whole milk

1/2 cup parsley

Jarred Marinara Sauce (good quality)*

In a bowl, blend all the ingredients together, except for the marinara sauce.  Form into golf sized (or smaller) balls.  Place a layer of meatballs on the bottom of your slow cooker, and drizzle with some of the marinara sauce.  Place another layer of meatballs.  Drizzle more marinara sauce.  Repeat until all meatballs are in the slow cooker.

Set slow cooker to high for 2 and a half hours.

*I have found that I need more than 1 jar of marinara sauce.  It’s an easy add.  Just judge from the amount of pasta you’ve made.

Enjoy!

(Source: Adapted from Tasty)

Quick and Tasty Carbonara

Quick and Tasty Carbonara

IMG_9172

I have tried many carbonara recipes over the years, as it’s one of my husband’s favorite comfort foods.  This recipe is my favorite of any I’ve tried, and it’s the quickest!  My daughter gobbled up her entire serving.  She told me that she likes this pasta as much as she likes cotton candy.  That’s saying something!

This past weekend, we had a lot of my family visiting, which was awesome, but we never got the chance to grocery shop for the week! Luckily, we had enough pantry items, that I managed to get our dinners done still.  Today, while I was at work, I was wracking my brain as to what I could make us for dinner.  I received my recipe of the day email from The Food Network, and that was my inspiration for dinner.  I had eggs, bacon, pasta, parmesan cheese, and parsley.  Thanks, Food Network!!

Here’s what you need to do:

Quick and Tasty Carbonara

1 pound spaghetti, dry

1/2 pound bacon, organic, thick cut, cut into smalls strips

2 tablespoons olive oil

4 garlic cloves, minced

2 large eggs, brought to room temp, cracked and whipped

1 cup of freshly grated Parmigiano-Reggiano, plus more for serving

1 bunch of parsley, finely chopped

Salt & Pepper to taste

Preheat pan on medium to medium-high heat.  Once hot, add bacon.  Drain off excess fat once cooked, except for 1 to 2 tablespoons.  At the same time, bring a large pot of salted water to boil over high heat.  Once boiling, cook pasta to al dente in texture. Reserve 1 cup of the pasta water for later use.

Combine the beaten eggs and cheese together and set aside.

Once bacon has cooked, and has been removed from the pan, toss in the minced garlic into the olive oil and bacon fat and stir continuously for about 1 minute.  Add your cooked pasta directly into the hot garlic oil mixture.  Remove the pan from the heat and add the egg/cheese mixture slowly, mixing constantly, to prevent the eggs from scrambling.  At this time, add in some of your reserved pasta water to help loosen up your sauce to the right consistency.  Season with salt and pepper, if necessary. Add in your minced parsley.  Enjoy!!

(Source: Tyler Florence Carbonara)

Cornflake Chicken Fingers

Cornflake Chicken Fingers

Since I’ve returned to work, planning quick and tasty weeknight meals has become a top priority for me. I have to think of my 4 year old, Leila, when I consider our meals, not because I don’t think she’ll try what I put in front of her, but because I want her to be excited for dinner and not always dreading trying something new.  She loves chicken.  She loves corn flakes.  She loves parmesan cheese.  Winner, winner, chicken dinner!!!

IMG_8882

They look good, right? But, they aren’t cooked yet!

Let’s talk dipping sauce for a second.  Because, you can’t have chicken fingers without a sauce!!  I like sauce with virtually everything. One of my favourite go-to dipping sauces is Honey Mustard.

IMG_8886

This is SUCH an easy sauce to make.  Just equal parts honey and dijon.  Stir, stir, stir.  Set aside.  You’re welcome!

Back to the meat…

IMG_8888

Here’s what you need to do:

Cornflake Chicken Fingers

1 1/2 pounds chicken tenders (0r boneless, skinless chicken cut into strips)

1 1/2 cups fresh corn flake crumbs

1/2 cup parmesan cheese

1/4 teaspoon pepper

1 teaspoon garlic powder

1 1/4 sticks butter, melted

Preheat oven to 400 F.  In a shallow bowl, mix together the corn flake crumbs, parmesan cheese, pepper and garlic powder. Set aside.  Place melted butter in another shallow bowl.  Line a baking sheet with aluminum foil.  Take one tender at a time, and dip into butter with one hand, and into corn flake mixture with the other hand.   Set onto baking sheet.  Repeat until all tenders are coated.  Bake for 25 minutes.  Serve with your favorite dipping sauce.  Enjoy!

(Source: Adapted by: Crispy Cornflake Chicken Strips)

Mexican Chili

Mexican Chili

I made this dish for a Halloween pot luck at work last week.  It was a hit!  It wasn’t too labor intensive and the sides to serve with it are pretty much a must!  They round this chili out nicely.

IMG_8803

Now imagine this chili with tortilla chips crushed over top.  My picture taking is a work in progress…

Here’s what you need to do:

Mexican Chili

4 lbs ground beef

1 medium onion, finely diced

4 garlic cloves, minced (I used only 3 because they were large)

2 8oz cans of tomato sauce

4 tablespoons chili powder

2 teaspoons ground cumin

2 teaspoons ground oregano (I only had dried and it worked just fine)

2 teaspoons salt

1/2 teaspoon cayenne pepper

1/2 cup masa harina (corn flour, found in the Mexican or International section of your grocery store)

2 19 oz cans red kidney beans, drained and rinced

2 19 oz cans pinto beans, drained and rinced

Toppings:

Shredded cheese

Tortilla Chips

Lime wedges

In a dutch oven, or heavy bottomed pot, over medium heat, add olive oil and cook onions until translucent.  Add ground beef and garlic and cook until the meat has browned.  Pour in the tomato sauce, chili powder, cumin, oregano, salt, and cayenne.  Stir well and reduce heat to simmer for 1 hour.

Drain the beans and rince well.  Set aside.  Measure the masa harina into a bowl and add 1 cup of water.  Stir to combine.  Add the corn flour mixture into the chili and allow it to simmer for about 10 minutes.  At this point, add water, 1/2 cup at a time, if you find your chili is too thick.  Add in your beans and warm through.

IMG_8803

To serve, plate the chili and squeeze a lime wedge over the chili.  Top with cheese and crushed tortilla chips.

Enjoy!

(Source: Adapted from Simple, Perfect Chili)

Kid Friendly Asian Lettuce Wraps

Kid Friendly Asian Lettuce Wraps

For tonight’s meal, I made Asian lettuce wraps.  Nothing crazy-new, but just that little bit different.  At first, my daughter was like, no way!  But, then she watched my husband and I assemble our wraps, and she wanted to give it a try. She liked it instantly.  *** Proud mommy moment ***

IMG_8762

Don’t mistake that face for disgust.  That’s lettuce crunching action!

We didn’t get home until about 5:30PM tonight.  Despite the steps to making these wraps, we were sitting down, eating, by 6:30PM,  Not bad, I’d say!  But, if you do have time, prepping the chicken in advance would save you some!  What I liked the most about these wraps, particularly for kids, was that they weren’t spicy.  In fact, the sauce to pour over top of them was a bit sweet.  I liked it enough to share the recipe with you. 🙂

IMG_8756

Here’s what you need to do….

Asian Lettuce Wraps

Stir Fry Sauce

2 tablespoons honey

1 teaspoon rice wine vinegar

2 tablespoons low sodium soy sauce

Dipping Sauce

1/4 cup honey

1/2 cup warm water

2 tablespoons low sodium soy sauce

2 tablespoons rice wine vinegar

2 tablespoons ketchup

1 tablespoon freshly squeezed lemon juice

1/8 teaspoon sesame oil

1 tablespoon dijon mustard

Chicken Stir Fry

1 tablespoon canola oil

1 tablespoon sesame oil

6 boneless, skinless chicken thighs

1/2 can, drained, water chestnuts, diced

1/2 cup mushrooms

1/2 cup finely diced yellow onion

2 cloves garlic, minced

Cabbage leaves or Iceberg lettuce leaves

Directions: 

Prepare the stir fry sauce in a small bowl and set aside.

To prepare the dipping sauce, add the ingredients, and bring to a simmer on medium heat.  Cook for about 5 minutes.  Set aside for serving.

For the stir fry, add both oils to a hot skillet, set to medium-high.  Add chicken and cook until no longer pink, about 10 minutes.  Drain all excess liquid.  Pour in the Stir Fry Sauce.   Add all other ingredients, except for the lettuce leaves, and let cook for about 5 minutes.

Serve with lettuce leaves.  Enjoy!!

(Source: Adapted from Skinny Ms)

The Mighty Meatball

The Mighty Meatball

I haven’t blogged much lately.  After my year on leave after losing my baby boy, I had the summer with my daughter to spend how we wanted.  She was out of preschool and I had finally felt like I could enjoy my time with her.  On July 4th, 2015, we threw the best memorial birthday bash we possibly could for my angel baby boy, David.  He would have been proud.  I know his sister was.  That day was healing for me.  A bright light on what could have been a very dark day.

Since then, I have returned to work as a teacher.  Crazy early mornings, long days, short nights, and it’s a good thing.  Because of the very little time I have in the evenings, being organized for my week ahead is a must.  I came across this meatball recipe from one of my favorite bloggers and Food Network chef, Ree Drummond.  The best part about making these meatballs is the variety you get from them: Sweet ‘n Sour Meatballs, BBQ Meatballs, Swedish Meatballs, Spaghetti & Meatballs….  It’s practically endless!

I followed this recipe to a T and, as usual, Ree didn’t disappoint.  They’re great!  I’m so glad I have them as a go-to in my freezer!!

IMG_8429

IMG_8438

IMG_8436

Here’s what you need to do:

The Mighty Meatball

5 pounds ground beef

1 1/2 cups plain breadcrumbs

1/2 cup milk

1/4 cup heavy cream

1/4 cup chopped fresh flat-leaf parsley

2 tablespoons grainy mustard

1 teaspoon each salt & pepper

1/2 teaspoon red pepper flakes (optional)

4 large eggs

2 tablespoons olive oil

Combine all of the ingredients in a bowl, except the olive oil.  Using your hands, combine the ingredients until well blended.  If you have one handy, use a scoop to help shape each meatball.  Otherwise, use a tablespoon.  Roll each meatball into uniform balls.  Place on parchment paper, and flash freeze for 10-15 minutes prior to cooking, so that they are less likely to fall apart.

To brown, heat a skillet over medium-high heat, with 2 tablespoons of olive oil (that is all you will need to cook the whole batch).  Make sure to brown the meatballs in batches, so as not to overcrowd the pan.  You don’t want the meatballs to touch.  Brown on all sides, about 5-10 minutes.  Remove onto a paper towel lined plate to drain off the excess oil.

To freeze, place the cooked and cooled meatballs on a baking sheet, lined with parchment, in a single layer, into the freezer, and allow the meatballs to freeze slightly.  Then, transfer into a freezer bag and store.  For my family, I only needed 20 per bag, which actually ended up being too many for 3 people.  15 per bag would be plenty for a family of 3.  🙂

Enjoy!

(Source:  Ree Drummond’s All-Purpose Meatballs)

Cheesy Sausage Pasta

Cheesy Sausage Pasta

FullSizeRender

On such a rainy, cool June day, something warm and comforting seemed, not only appropriate, but necessary!!  This is the coldest June I can ever remember!  I wish my running were better, because it is definitely a good month for that!!  But, running, at least for me, was not happening today. With the forecast calling for ‘buckets of rain’, our basic plan for the day was staying in, keeping cozy, and watching movies!!  We did manage to get to the St. Lawrence Market this morning, before the rain started.

The St. Lawrence Market is one of our favorite places to go on a Saturday morning.  There are farmers markets in different areas of the city every day in Toronto, but none as big as the St. Lawrence Farmers Market on Saturdays.  Our typical Saturday there involves a breakfast sandwich, smoothie and wandering around buying local fruit, veg and meat.

Today, among other things, we bought local sausage from the Tanjo Family Farm, located in Millbank, Ontario.  When we were following the Whole 30 program, and were craving sausages, we couldn’t find ANY without added sugar!  Until we happened upon the Tanjo Family Farm.  They don’t add any sugar to their sausages.  They even had the ingredients listed for us to make sure.  They were the best tasting sausages EVER!  Needless to say, we like these guys.  They tend to sell out of their product, so we had get there early to make sure we could get some.  Today, we got 6 Italian sausages and a 3 pound pork shoulder!  I’m excited about the pork shoulder, and have a recipe in mind!  I’ll share that later. 🙂

With all the rain today, going outside to grill sausages just wasn’t going to happen.  As I was thinking of what to make for a late lunch, I realized I had everything to make a yummy, warming, pasta!  The sausage would work perfectly!!  If you have any on hand, feel free to add in some arugula or spinach.  Would be a great addition!!!

Here’s what to do:

FullSizeRender

Cheesy Sausage Pasta

3 Italian sausages, casings removed

1 large shallot, diced

500 ml marinara sauce

1 whole Buffalo mozzarella, cubed

1/4 cup parmesan cheese

Olive oil

Salt & pepper to taste

Shelled pasta (or whatever pasta ya got!)

Boil pasta in salted water until al dente.  Set aside.  Saute shallots in olive oil, add sausage and about 1/2 teaspoon of salt and some pepper.  Stir occasionally, until sausage is cooked through.  Add marinara sauce and allow the sauce and the sausage to get to know each other for a bit.  Just before adding the pasta, add the mozzarella cheese.  It will melt pretty quick!  Add pasta, parmesan cheese and season with salt and pepper, if needed.

Enjoy this ooey, gooey goodness!

(Source: Boss Of The Apple Sauce)